Pin Curling Perfection! – A Review of the Sculpture Pin Curler

I never really pin curled my hair before, because it is rather labour intensive and with my bad post operative shoulder it made it very difficult to do it. So basically all I had were foam rollers for wet sets and hot rollers. That was until I had the pleasure of using the Sculpture Pin Curler.

Yuan, who runs the site which sells the Sculpture Pin Curler at Vintage Hair, was so sweet and very helpful. She sent me the Pin Curler and I received it from Australia in a matter of 7 days, which is no small feat, considering! Everything was packaged very well, and it all was very crisp and in good shape.

20120606-205949.jpg

20120606-210116.jpg

20120606-210137.jpg

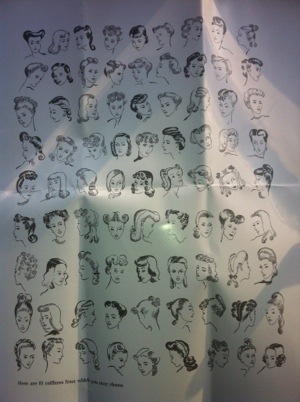
The packaging is gorgeous, and it makes it feel like it is straight out of the forties! Even the inserts have a vintage feel, as well as the two gorgeous posters that are included to give you some hair inspiration! This is packaging you will want to keep with the curlers because it is so lovely 🙂

Now, onto the curler! Initially, you may think the contraption is very basic, which it is, but that is what makes it amazing. You don’t have to have an engineering degree to use it. I found it very easy to use despite my bad shoulder and not being able to keep my arm up for more than 5 or 10 minutes. All you do is insert one end of the curler into a section of hair (I have to do small sections, about a half an inch, due to my large amount of thick hair), comb it through to the end as much as you can without it falling out, and roll it up towards your scalp. Now I recommend going only to ear level, as that will give you a more authentic set, and no crazy clown hair 🙂 Then all you need is to bobby pin it in place in an “x” shape or to use pin curl clips, which I used myself.

20120606-211026.jpg

20120606-211048.jpg

I used Lottabody setting lotion, and used an down-up-down curling direction in order to get that perfect retro wave. I let it set overnight (as I tend to like to have my hair get more than enough time to dry and set, with it being thick and all), and awoke the next morning all excited to see what the results were.

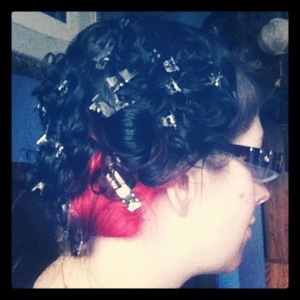
What were they? Glorious! My first time really authentically pin curling on myself came out to be magic. I got those perfect ringlets you need in order to brush out to a perfect glam retro look.

20120606-213100.jpg

It took me a little while to brush out, as most pin curl sets do, and it is a bit of a practice in patience. But you will get it if you keep at it and keep brushing, don’t despair! Unfortunately, I don’t have an after picture of it all brushed out because I was in a rush to go run an errand that needed to be done ASAP, so I was going to take the picture later. Sadly, my set did not last as I accidentally got caught in the pouring rain walking to where I needed to go, and it made my set fall mostly flat! I was a little disheartened by that, but that had nothing to do with the performance of the pin curler. That would happen no matter what kind of way you set your hair, almost like taking a shower!

I would highly recommend this product to all of my readers out there, and despite the $35 price tag, it is completely worth it. You will get so many uses out of this little wonder, and it is sturdy and not something that will only last for a few times. It is also available for $15 for just one curler (the other set you get two), and you can let Yuan know you wanted the inserts and she will be glad to email you a PDF. The Sculpture Pin Curler is based on an authentic vintage styling tool, so you will get the most authentic sets that you can possibly get! This tool does everything from setting to styling, and it will soon become the go-to tool in your beauty arsenal for fabulous vintage hair. I plan to use it as much as I can!

Necessary Tools for Great Vintage Hair

Hi dolls!

Today I decided to do a post on the necessary tools and tricks for achieving great vintage hair. I have learned a lot over the years, and take very good care of my hair. And in my time of doing vintage hair, I have found a few tools to be necessary in order to get the look you desire.

Hot Rollers

Hot rollers are great at getting a lose and gorgeous curl in your hair, like Rita Hayworth or Veronica Lake. It also helps at molding your hair to do easy and defined victory rolls, bumper bangs, and the like. Make sure to buy a good set though! Read the reviews before you buy. I have a set by Hot Tools Professional that have been great so far. But before you take them out, make sure they are completely cool first! And I usually blow my hair dry beforehand using a curling mousse to help define and enhance the curl more.

Hair Dryer

I think this is a pretty obvious one 🙂 To be used to both hot and cold sets prior to rolling. I consider ionic dryers to be the best, as they add shine to your hair and don’t cause as much heat damage.

Curl Enhancing Mousse

This helps as a great base to start any of your styles. Apply to wet hair and blow dry, and you are ready to begin styling! Tresemmé has great mousse.

Heat Protecting Spray

This will protect your hair from heat damage, and as we all know, heat is probably the worst thing for your hair. I use Tresemmé’s spray, which can be found in drug stores for about $6. I take sections of my hair, spray some of it on, finger comb it through a bit, then roll my hair.

Cold Set Rollers

This is the single most important thing to getting an authentic vintage look. I have been using sponse/foam rollers, but soon I will be making my own pillow rollers, which I prefer. You rarely roll to what is called “on base” (all the way to the scalp), unless told to do so. Most of the time you roll to about ear level in order to achieve the look where the crown is flat. Women did this so that they could wear hats without fudging up their hair. Going out with a hat was seen as a necessity!

Setting Lotion

This is something you will need to use in order to do your cold sets. It will help to hold the curl and keep its shape. I prefer to use Lottabody Professional Setting Lotion. Please see my tutorial on how to do a cold set for thorough directions on how to use it to set your hair.

Scarf/Hair Cap

This is in order to keep your curlers in the right places when you are doing other things you need to do or are sleeping. It protects the hair also when you are out on a windy day, it’s raining, or you just want a little vintage glamour mystery 🙂

Rat Tail Comb

This is great for dividing your hair into sections to roll or style, as well as tease and do finishing touches on your style. Super helpful!

Plastic Bristle Brush

This is perfect for combing out your curls into a great vintage set. You may need to brush for a little bit in order to defrizz enough. It’s also great for shaping your curls by brushing against your hand.

Bobby Pins

This is an absolute must to hold your styles in place! For most shapes and styles you will need to use at least a few bobby pins. But also be cautious – some bobby pins do not hold as well as others! I have found Goody to have decent pins.

Hairspray

Of course this is a no brainer! It helps to hold your hair where it needs to be held, and can work well at prepping your hair as well.

Hair Rat

This will be needed to create bumper bangs and many styles of the like. Get one as close to your own hair colour as you can. I have a black hair rat, and it works very well. You can find them for pretty cheap on Amazon.

Layrite

Layrite is an amazing pomade that I use consistently. It holds your hair without looking greasy and leaves a wonderful shine. Smells amazing too! All us rockabilly/vintage/retro people use it, it is very well known. Definitely worth the investment! Click on the banner on the sidebar to check it out and see more great products from Hawleywood’s.


These are the basics that I can think of to list to start off your vintage styling correctly. Of course you can accessorize with snoods, hair flowers, bandanas, scarves, hair combs, and things of the like. Check out some classic movies and think of how the hair might have been styled, and try to recreate it. It may take some time to really get the hang of it like I did, but once you do it will be very natural to you.

Just remember – practice, practice, practice!